Key Takeaways
- Start with a board, bindings, boots, and a helmet.
- Dress in layers that handle sweat, wind, and cold.
- Protect your eyes, wrists, and tailbone to avoid common injuries.
- Keep a small kit for fit tweaks and quick fixes on the hill.
Snowboarding feels better with the right setup and fit. But what gear do you need for snowboarding? A safe, warm rider learns faster and enjoys longer days. Begin with certified head protection, clear vision, and dry layers. Then match your board and boots to your body and style. Add wrist guards and impact shorts if you are new or cautious. Pack a few tools so you can adjust on the fly. The list below explains each item, why it matters, and what to look for.
What Gear Do You Need for Snowboarding?

Snowboard
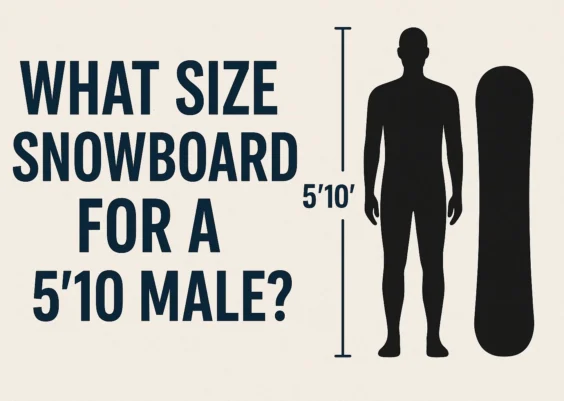
The snowboard is the core of your setup. Choose a size that stands between your chin and nose when upright. A shorter board is easier to control for beginners, while longer boards feel stable at higher speeds. Wide-footed riders should pick wide boards to prevent toe and heel drag.
Flex rating is another key factor. Soft to medium flex (rated 3–5) helps beginners turn more easily, while stiff boards suit advanced riders. A well-chosen snowboard reduces fatigue, improves balance, and makes learning smoother. Always match board type with terrain: all-mountain, park, or powder.
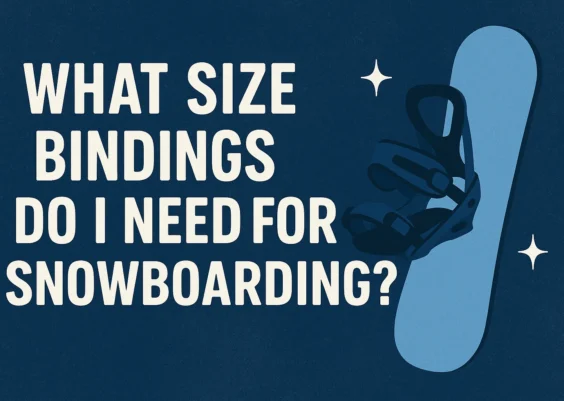
Bindings
Bindings connect your boots to the snowboard and transfer movement. Good bindings match both your boot size and board width. Beginners often do well with medium-flex bindings that provide control without feeling stiff. Straps should hold your boots firmly without pinching.
Modern bindings come with tool-less adjusters, which let you tighten or loosen straps quickly on the hill. Highbacks support your calves and control heelside turns, so adjust them for comfort. A proper binding setup gives stability, prevents foot pain, and helps you progress faster. Always check screws before every ride.
Boot
Boots decide how comfortable and responsive your ride feels. They should fit snugly, with toes lightly brushing the front and no heel lift when bending your knees. If your heels rise when turning, you’ll lose control. Many boots have heat-moldable liners that shape to your feet for added comfort.
Beginners should stick with soft or medium flex boots, as they make turning easier and less tiring. Lacing systems vary: traditional laces, quick-pull, and BOA dials. Choose the one that feels most secure and easy for you. Never wear thick cotton socks; one proper snowboarding sock is enough.
Helmet
A helmet is non-negotiable. Look for one certified for snow sports, such as ASTM F2040 or EN 1077. Bike or skate helmets are not designed for cold or impact on snow. A good helmet should fit snugly but not press painfully on your head. Many models come with adjustable dials at the back to fine-tune fit.
Ventilation is another useful feature for long days, helping you stay warm but not overheated. Some helmets include audio pockets for speakers. Wearing a helmet reduces the risk of head injuries and gives you the confidence to push your limits safely.
Goggles
Goggles protect your eyes from wind, snow, and UV rays. They also improve vision in changing light. Choose lenses based on VLT (Visible Light Transmission). Darker lenses (10–20% VLT) are best for bright, sunny days, while lighter ones (30–60% VLT) work better in cloudy or snowy conditions.
Many goggles now come with interchangeable lenses for versatility. Look for anti-fog coatings and good ventilation, as fogged lenses make riding dangerous. The strap should fit snugly around your helmet without slipping. Clear, wide vision helps you spot obstacles early and ride with more confidence.
Snow Jacket
A snowboarding jacket protects you from wind, snow, and moisture. Look for waterproof and breathable ratings of at least 10K/10K. This balance keeps water out while letting sweat escape. Many jackets have features like pit zips for ventilation, powder skirts to block snow, and pockets designed for passes or goggles.
Fit is important – too tight limits movement, while too loose traps cold air. Bright colors or reflective details also improve visibility on crowded slopes. A quality jacket keeps you warm, dry, and comfortable, so you can ride longer without worrying about the weather.
Snow Pants
Snow pants shield your lower body from snow and cold. Like jackets, look for at least 10K waterproof and breathable ratings. Reinforced cuffs are helpful because snowboard edges often cut into the fabric. Suspenders or adjustable waistbands give a secure fit without sliding down.
Some pants have vents on the inner thighs to release heat during active runs. Choose pants roomy enough to fit impact shorts underneath. Elastic gaiters at the ankles stop snow from getting into boots. Durable snow pants prevent discomfort and let you focus fully on your riding instead of staying dry.
Base Layer Top
Your base layer top is the first layer against your skin. It manages sweat and body heat, so never wear cotton—it stays wet and makes you cold. Instead, choose synthetic fabrics or merino wool. For most conditions, a 150–200 gsm merino wool top works well, offering both warmth and breathability.
Look for flat seams to prevent rubbing against the skin. Long sleeves with thumb loops can stop cold air sneaking in at your wrists. A good base layer top helps you stay dry, warm, and comfortable all day on the mountain.
Base Layer Bottom
Base layer bottoms play the same role as tops by keeping you warm and dry. They are worn under snow pants and should also be synthetic or merino wool. On mild days, lightweight bottoms are enough. For colder days, thicker weights keep your legs comfortable.
Avoid cotton, as it traps sweat and chills you quickly. Look for snug but not restrictive fits, so you can move easily. Flat seams reduce irritation when riding for hours. When paired with waterproof snow pants, a quality base layer bottom gives steady warmth and moisture control.
Mid-Layer (Fleece or Light Puffy)
The mid-layer provides extra insulation between your base layer and outer shell. Popular options include fleece tops, grid fleeces, or lightweight synthetic puff jackets. A fleece mid-layer is breathable and works well on most days. For colder conditions, a synthetic puffy adds warmth without bulk and still insulates if damp.
Avoid heavy cotton hoodies, as they soak water and weigh you down. Choose a mid-layer that is easy to pack and remove, so you can adjust depending on weather. A flexible mid-layer keeps your body temperature balanced through changing mountain conditions.
Snowboard Socks
Snowboard socks are designed to keep your feet warm and dry while reducing blisters. They are usually made from merino wool blends or synthetic fabrics. One tall, over-the-calf sock is enough, never layer two pairs, as it causes pressure points.
A good snowboard sock has light padding in key areas like the shin and heel but remains thin enough to fit inside boots without restricting circulation. Avoid cotton, since it absorbs sweat and makes feet cold. High-quality socks improve comfort, prevent foot fatigue, and help your boots perform as they should.
Gloves or Mittens
Cold hands can ruin your day quickly. Gloves give you better finger movement, while mittens trap more warmth in extreme cold. Many snowboarders carry both and switch depending on conditions. Look for gloves or mittens with waterproof membranes, such as Gore-Tex inserts, and insulation suited to your climate.
Wrist leashes are handy so you don’t drop them on lifts. Some models also come with touchscreen-friendly tips for phones. Proper gloves or mittens let you adjust gear, handle snow, and stay warm throughout the day.
Wrist Guards
Beginners often fall on their hands, which makes wrist injuries common. Wrist guards provide extra support and reduce the chance of sprains or fractures. Some are slim enough to fit under gloves, while others are designed to be worn over them. Look for lightweight, durable models that allow enough movement to grip and adjust gear.
Even advanced riders sometimes wear wrist guards when practicing tricks. Adding this simple protective gear helps you ride with confidence and reduces time lost to painful falls.
Impact Shorts
Impact shorts are padded shorts worn under snow pants. They protect hips, thighs, and the tailbone from hard falls. This makes them especially helpful for beginners who fall often or riders practicing park tricks. Impact shorts are usually made of flexible foam panels that absorb shocks without limiting movement.
Some models use memory foam or gel for added comfort. The padding can prevent bruises and soreness, making it easier to keep riding longer. For anyone nervous about falls, impact shorts add an extra layer of safety and peace of mind.
Back Protector (Optional)
A back protector shields your spine from impacts. It is often worn by riders who go into terrain parks, ride at higher speeds, or venture into trees. Most protectors are slim, lightweight, and designed to fit comfortably under a jacket.
Look for CE-certified models that prove tested safety standards. Straps should hold it snug without restricting movement. While optional, a back protector offers valuable protection for riders who push their limits. It helps prevent serious injuries and gives added confidence in challenging terrain.
Neck Gaiter or Balaclava
A neck gaiter or balaclava shields your face and neck from wind, cold, and snow. They are usually made of soft, breathable fabrics like fleece or merino wool. A gaiter is simple to pull up over your nose, while a balaclava offers full coverage including head and face.
Choose moisture-wicking material to prevent fogging in your goggles. Some models even provide UV protection for sunny days. This small piece of fabric makes a big difference in comfort and warmth during long rides.
Beanie or Helmet Liner
If you ride without a helmet (not recommended), a beanie keeps your head warm. For helmet users, a thin liner can add comfort on very cold days. Avoid thick beanies under helmets, as they ruin the fit and reduce safety. Look for breathable, quick-drying fabrics.
Some liners cover ears, while others focus only on the crown. This lightweight addition is easy to pack in a pocket. Having a beanie or liner ensures warmth when you need it without compromising helmet safety.
Stomp Pad
A stomp pad is a small, grippy pad placed between your bindings on the board. It helps when getting off chairlifts by giving your back foot traction. Without one, your boot can slide on the slick top sheet, making balance tricky.
Stomp pads come in rubber, foam, or metal styles, with designs ranging from simple dots to shaped logos. Installation is easy: peel the adhesive and stick it firmly. While optional, a stomp pad adds convenience and control during one-footed moves on flat terrain.
Tool (Multi-tool)
A snowboard multi-tool is handy for making quick adjustments on the hill. It usually includes screwdrivers and wrenches that fit binding screws and bolts. Having one lets you tighten loose hardware, adjust strap positions, or fine-tune highbacks without visiting the lodge.
Compact tools fit easily into a pocket or backpack. Some even come with ratcheting handles for faster use. Keeping a tool with you prevents small problems from cutting your day short and keeps your setup riding smoothly.
Wax and Scraper
A well-waxed board glides better and turns more easily. Wax reduces friction with snow, keeping your base smooth and fast. Apply all-temperature wax every 3–5 days of riding, or use specific formulas for warm or cold conditions. After applying hot wax, use a plastic scraper to remove excess.
A brushed finish adds even better glide. Carrying a small rub-on wax bar for emergency use is also helpful. Regular waxing not only improves performance but also protects the base from drying out and cracking.
Lock
Snowboards are expensive, and theft is common outside busy lodges. A small cable lock prevents someone from quickly walking away with your gear. Lightweight combination locks are easy to carry in your pocket.
Use the lock to secure your board to racks or fixed objects while taking breaks. Though not impossible to cut, a lock discourages casual theft. It adds peace of mind when you’re inside a café or renting gear.
Sunscreen and Lip Balm
Snow reflects sunlight strongly, which increases UV exposure. Even on cloudy days, you can burn faster than at the beach. Always use SPF 30 or higher sunscreen on your face, neck, and exposed skin. Lip balm with SPF prevents painful cracking and burning.
Reapply both every few hours, especially after eating or sweating. Carry small travel sizes in your pocket for easy access. Protecting your skin keeps you comfortable during and after your trip.
Hydration and Snacks
Riding burns a lot of calories and dehydrates you faster than expected. Carrying a water bottle or hydration pack prevents fatigue and headaches. Quick snacks like energy bars, trail mix, or fruit keep your energy steady. Choose snacks that won’t freeze in the cold.
A few bites on the lift or during breaks make a big difference in endurance. Staying fueled and hydrated helps you ride longer, react faster, and stay safe.
FAQs
Do I need a helmet for snowboarding?
Yes. Use an ASTM F2040 or EN 1077 certified snow helmet.
How tight should snowboard boots fit?
Snug, with toes lightly touching at rest and no heel lift when flexing.
What lens color works best for most days?
A versatile lens near 20–30% VLT covers mixed light well.
Are wrist guards worth it for beginners?
Yes. They lower the chance of wrist sprains from falls.
How often should I wax my board?
About every 3–5 days on snow, or when the base feels dry.
Should I get gloves or mittens?
Choose mittens for warmth, gloves for dexterity. Pick based on temperature.
What sock material is best?
Merino wool blends manage sweat and reduce blisters.
Do I need impact shorts?
They help protect hips and tailbone. Many new riders love them.
What gear do you need for snowboarding? Start with a board, bindings, boots, and a certified helmet. Add goggles that match your light conditions. Wear moisture-wicking base layers and a weatherproof shell. Protect hands, wrists, and tailbone to stay on the snow longer. Keep a small tool, wax, and a lock in your pack. Drink water and carry simple snacks. Check screws before each session. Small prep steps add comfort and confidence. Gear that fits well helps you learn faster and have more fun.